Introduction
The appeal of watercolor painting
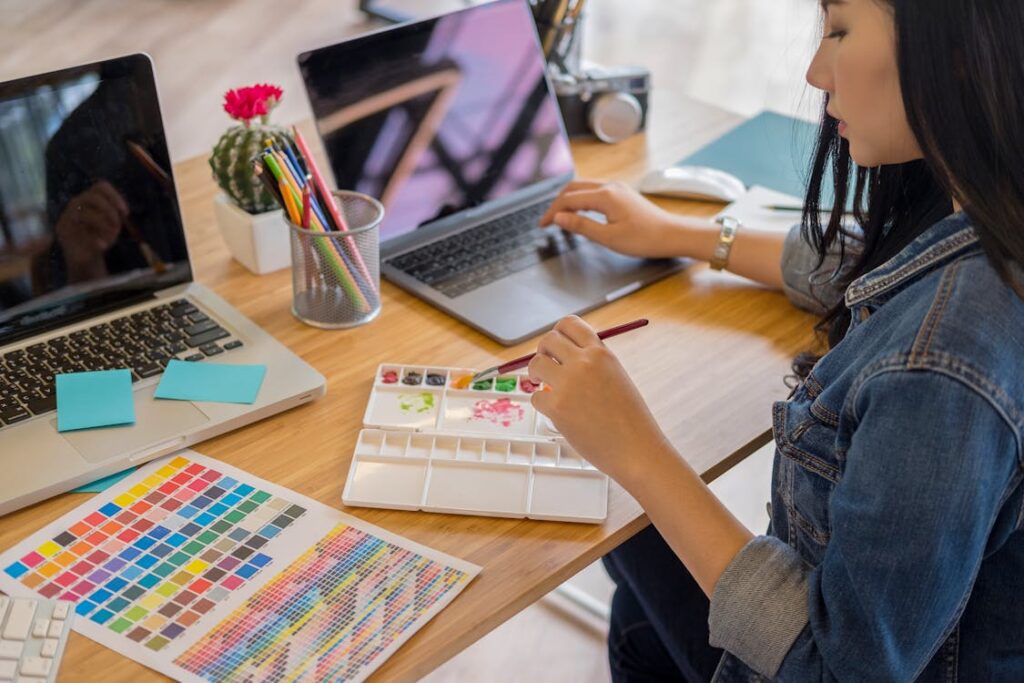
Watercolor Painting is a fun and relatively easy way to get into painting, and it’s how I started. It’s affordable up front when compared to other media such as acrylics and oils. It’s easier to clean, takes up less space, has unique qualities not often seen in other media such as luminescence and a matte appearance.
Encouragement for beginners
Watercolor painting is one of those things that’s not too easy to figure out and difficult to master. One of the main reasons is that the properties of watercolor lend themselves to a loose and open ended approach to painting while at the same time requiring the artist to think well ahead how to approach the work. The paint and water do what they want and the artist needs to roll with the punches, and still maintain a solid plan.
Additionally, the artist needs to be well acquainted with the tools they’re using in order to properly guess what will happen when they do certain things. watercolor paint is transparent, which means if you put a mark down, there’s no painting over it without the underneath layer showing through. There’s no white paint either so the highlighted areas of one’s subjects must be left blank to allow the white of the paper act as the white in the painting. This is called the additive method of painting, where the painting is built up using darker and darker colors and all the highlights are indicated and preserved throughout the painting.
Choosing Your Materials
Watercolor paints
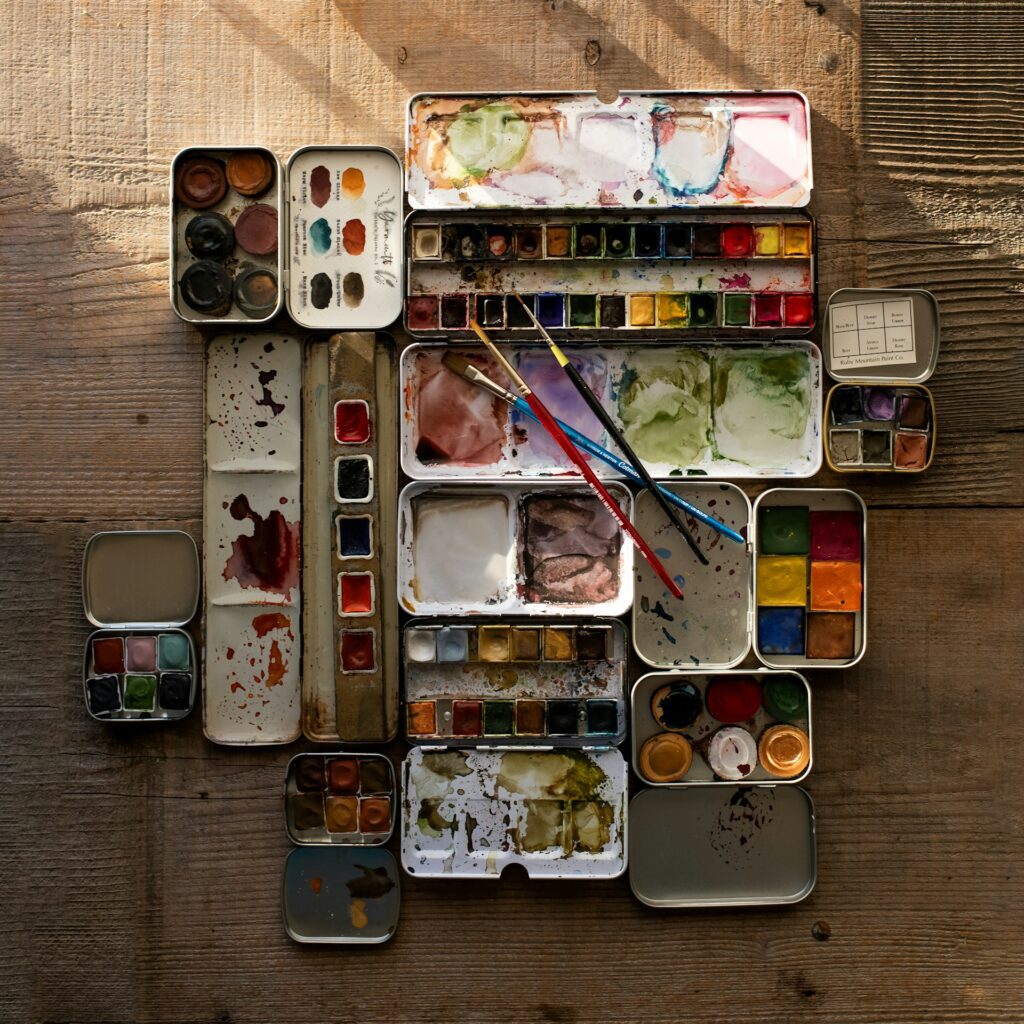
One reason watercolor painting can be so affordable is that you can get great results even with affordable watercolor paints. The problem is that some cheaper paints aren’t created with the same standards as student or professional quality paint. The colors might not mix or behave in the same way and good results are harder to achieve. A good solid set of watercolor paints to start with is Winsor & Newton Cotman. In a later post I will cover the best paints for watercolor artists across all budgets. For now, a good rule of thumb is to get the best quality paint that you can budget for. It’s better to have 2 or 3 colors of professional paint than 24 or 36 colors of cheap paint.
Watercolor Paper

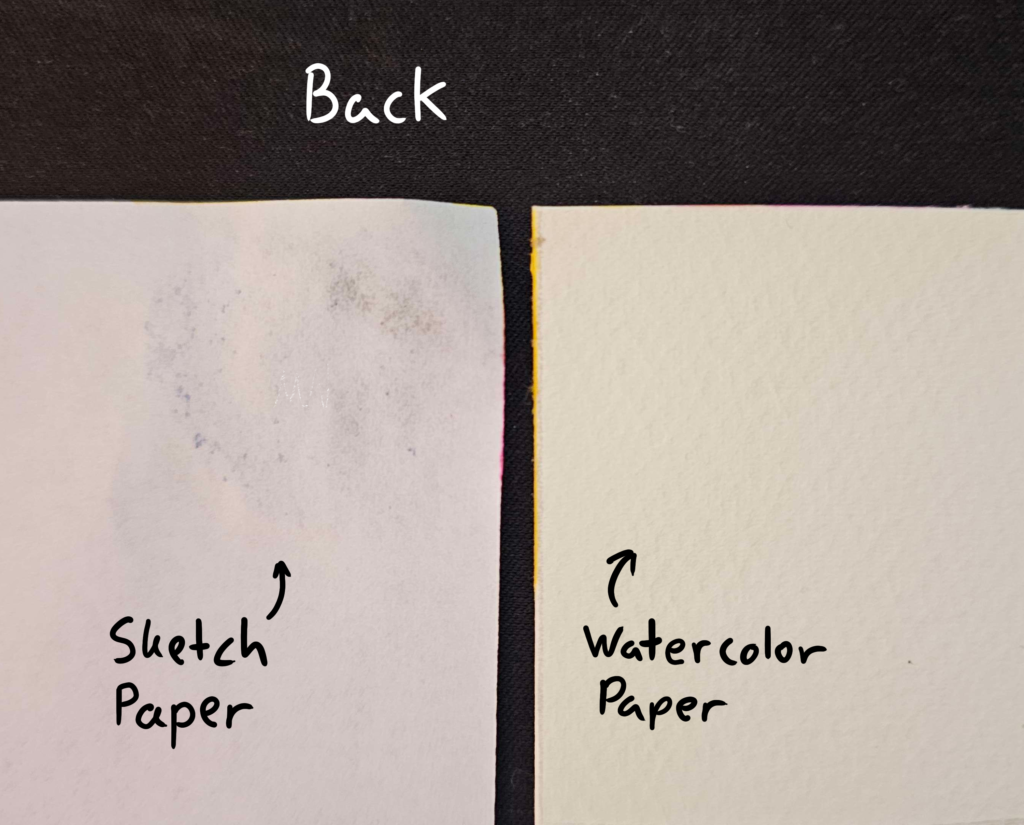
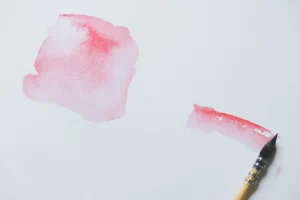
Paper is probably the most important material you will use. The quality of the paper will greatly influence the enjoyment of painting and the final result. Notice in the above image how much better the watercolor paper holds color and holds its shape when compared to the sketch paper.
You can’t just use any paper when watercolor painting. Paper needs to be of a certain weight (thickness) and prepared for watercolors with a process called sizing. Sizing causes the watercolor paint to sit on top of the paper rather than soaking in. This keeps your paper from turning into a wet rag. Additionally, most paper is made of wood pulp, which is often bleached to be white and contains acid. Acid eats away at the paper and makes it turn yellow over time. Always look for an “acid-free” when purchasing watercolor paper to have much longer lasting paintings.
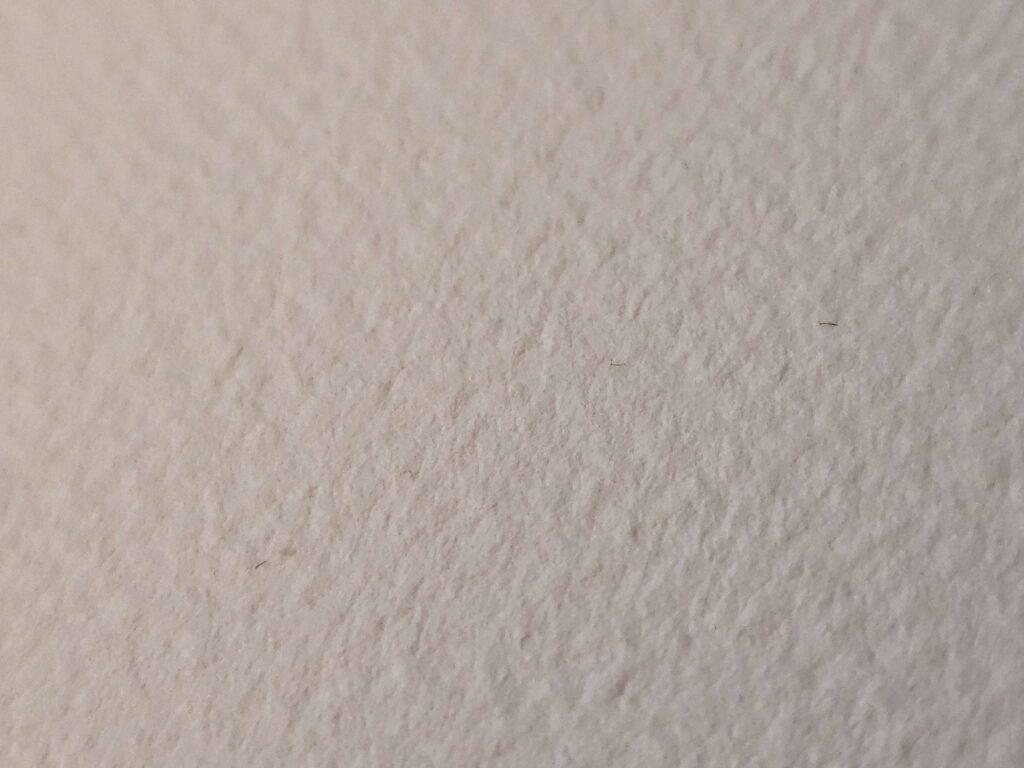
The best paper For watercolors is made of 100% cotton, which is naturally white and naturally acid free, with the added benefit of being much more sturdy than any wood pulp paper. It’s also much more expensive so when you practice in the beginning, it’s not always necessary. A good rule of thumb is to have some cheaper paper for testing out some colors, and then 100% cotton paper for your finished work. You can practice on cheaper paper but keep in mind that the experience will be different when you transition to 100% cotton.
The style of paper varies. There are typically 3 types or textures you can find with watercolor paper- cold press (textured), hot press (smooth) and rough (very textured). The paper you use would be determined by your own preferences and the style of artwork you are trying to achieve. Typically it’s encouraged for students to start with cold press paper as it is the most common and forgiving of the three.
Watercolor paper should be labeled something like: 140lb (weight), acid-free, cold press watercolor paper. If you want a list of the top watercolor papers I use for best results, check out [TOP ?? INSERT TOP PAPER HERE]
Watercolor Brushes
[add images of brushes]
For brushes, it’s important to use a brush specifically designated for watercolor painting. A watercolor brush will typically be soft and smooth and hold a lot of water. A good way to test if you found a good brush is if you bend the bristles and they always snap back into place upon release, wet or dry. In a watercolor painting, we would usually start with the biggest brush we can, and as the painting progresses, we switch to smaller brushes to handle finer details. In another article [HERE] I discuss the best brushes one can use for watercolor painting.
Basic Watercolor Techniques
Wet-on-wet, wet-on-dry, dry on dry, dry on wet.

There are 4 methods in watercolor painting. To learn how to use each effectively is most of the work. Its very simple. Wet on wet means you apply wet paint to a wet surface. Wet on dry is wet paint on a dry surface. Dry on dry is when you don’t add water to the brush or the paper, and so on.
Play with these 4 techniques and take note of what happens, and where each technique might come in handy.
Water Content
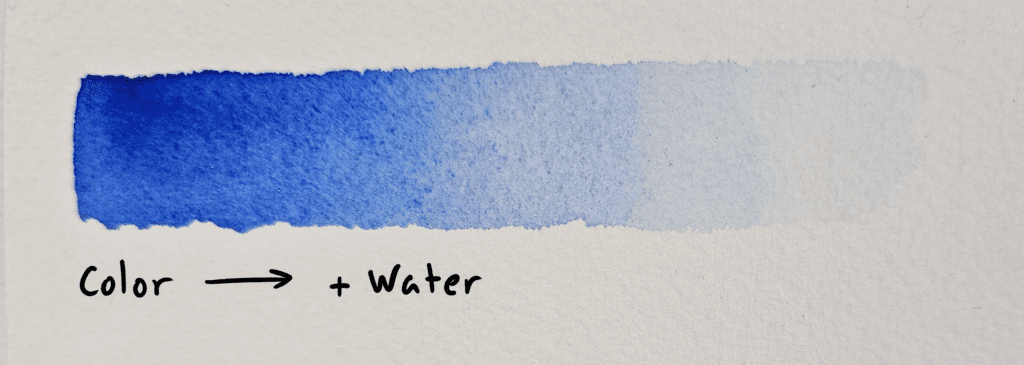
When using watercolors, we almost always add water. The ratio of paint to water will determine how light or dark a color will be. In acrylics or oils, if you want to make a color lighter, you add a lighter color to it (ie. blue+ white= light blue). Since watercolor is a transparent medium, adding any two colors together will always result in a darker color. Alternatively, if you layer paint over and over, it will eventually result in the mass tone (fully saturated) color as if you applied a fully saturated layer to begin with.
Layering and blending colors
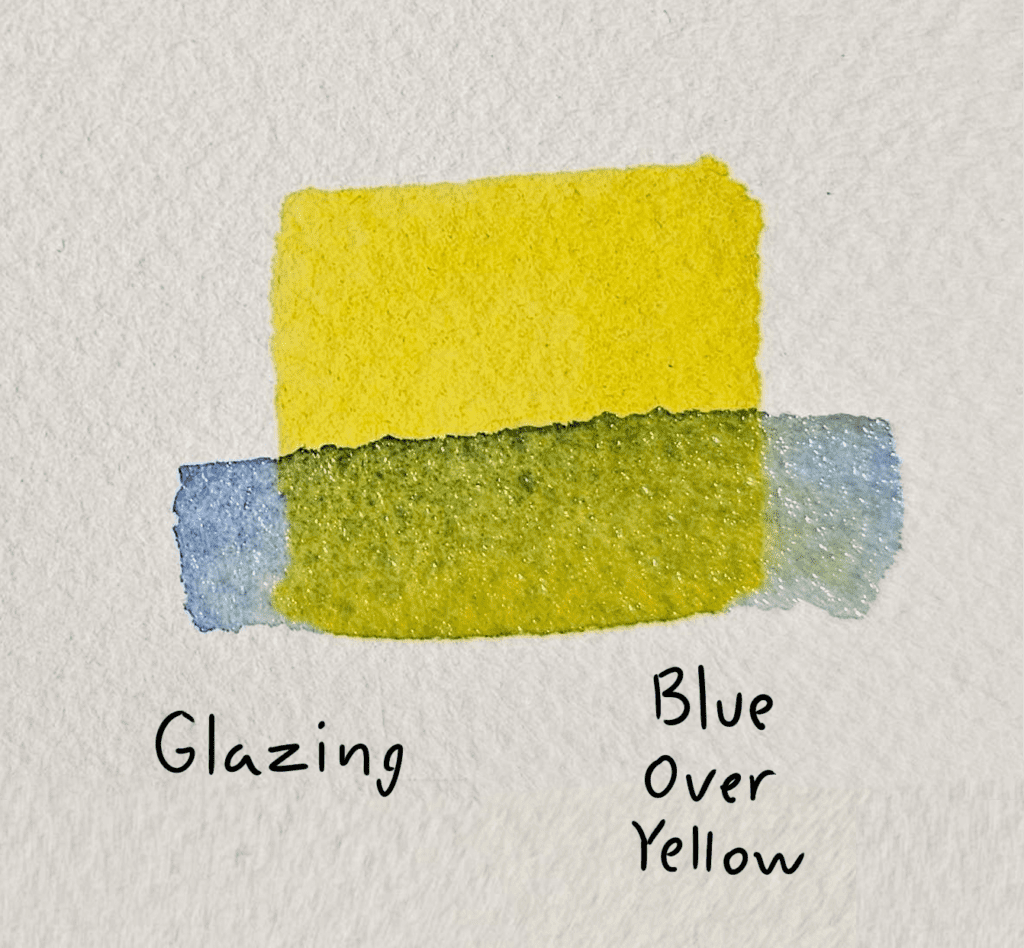
Glazing (layering) and charging (or blending) are important tools in watercolor. Given its transparent nature, paint of different colors can be glazed on top of one another after each layer is completely dry. This creates an effect similar to laying colored panes of glass on top of one another. So if you apply a blue, then after it dries, apply a yellow on top of it, you would get a green. If you place yellow down first, then blue, you get a different green. There’s a lot to experiment with, so it’s a good idea to keep your colors limited as a beginner, and really get to know each color and how it interacts with the others.
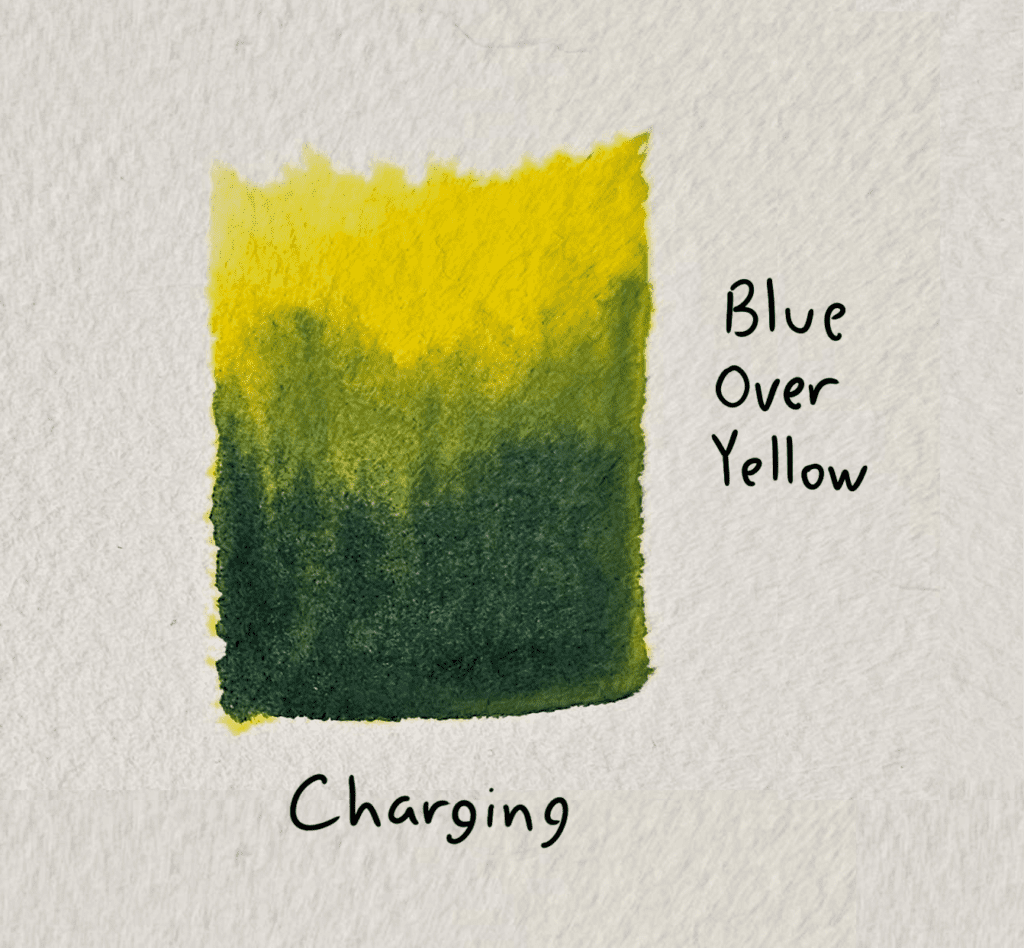
Charging is when your first layer is still wet, and you apply the second layer on top. If you have already practiced the wet on wet technique, you may have noticed that when you touch a wet area with a brush loaded with paint and water, the new paint starts rushing in and mixing into the wet area on its own. The benefit of charging over glazing is that rather than carefully controlling what happens, the properties of the paint do more to determine how the colors mix together and what effect is created. This looks more wild, chaotic, natural. More loose and often more interesting to look at.
Some watercolor artists state that charging, or mixing the colors directly on the paper as they paint, often results in a more dynamic and natural looking painting. While this might be true, both glazing and charging have their uses and neither method is better than another for everything.
Color Theory and Mixing
Understanding the color wheel
This will be a very short introduction to mixing color. If you want to learn more about color and how it works, check out my full comprehensive intro to color and color theory here.
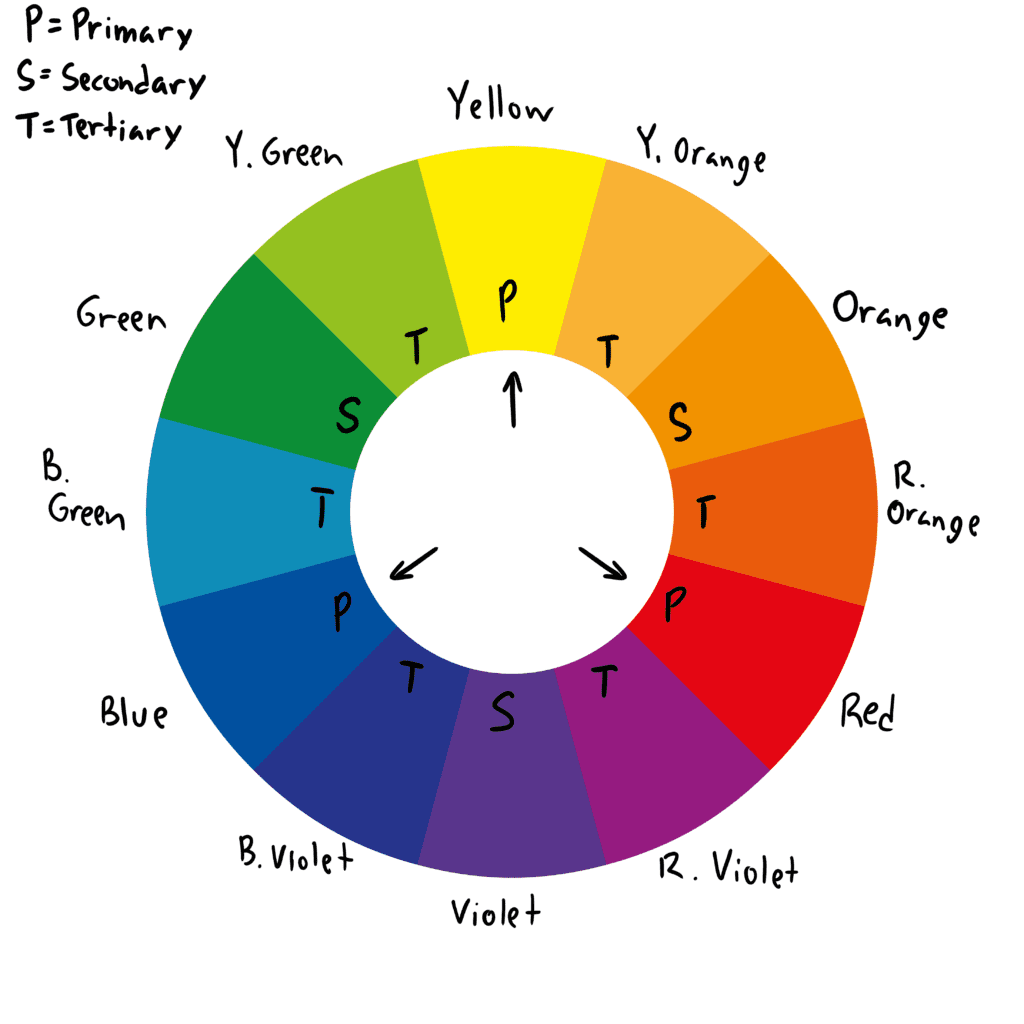
First thing we should do is create a color wheel. In the beginning, this will be a very helpful reference and a good way to get used to applying paint. You can follow along with mine or make your own style. The important thing is the content of the wheel is correct.
You don’t need a lot of colors to start. In fact, this will complicate things for a beginner. You need a red, a yellow, and a blue. These will be your primary colors.
There are three kinds of color in paint – Primary, Secondary, and Tertiary. The primary colors, red, yellow, and blue (or cyan, magenta, and yellow) cannot be made by mixing. The secondary colors, on the other hand, are the result of mixing two primary colors together, and they are orange (red+yellow), green(blue+yellow) and violet (blue + red). The tertiary colors are the result of mixing a secondary color with a primary color (ie. red-violet or blue-violet)
That’s why you don’t need all the colors. You can make every color with just the three primaries. For beginners this is perfect because every pre-made color has many properties to familiarize oneself with, so it’s a lot less to deal with keeping your palette short at first and adding colors slowly over time.
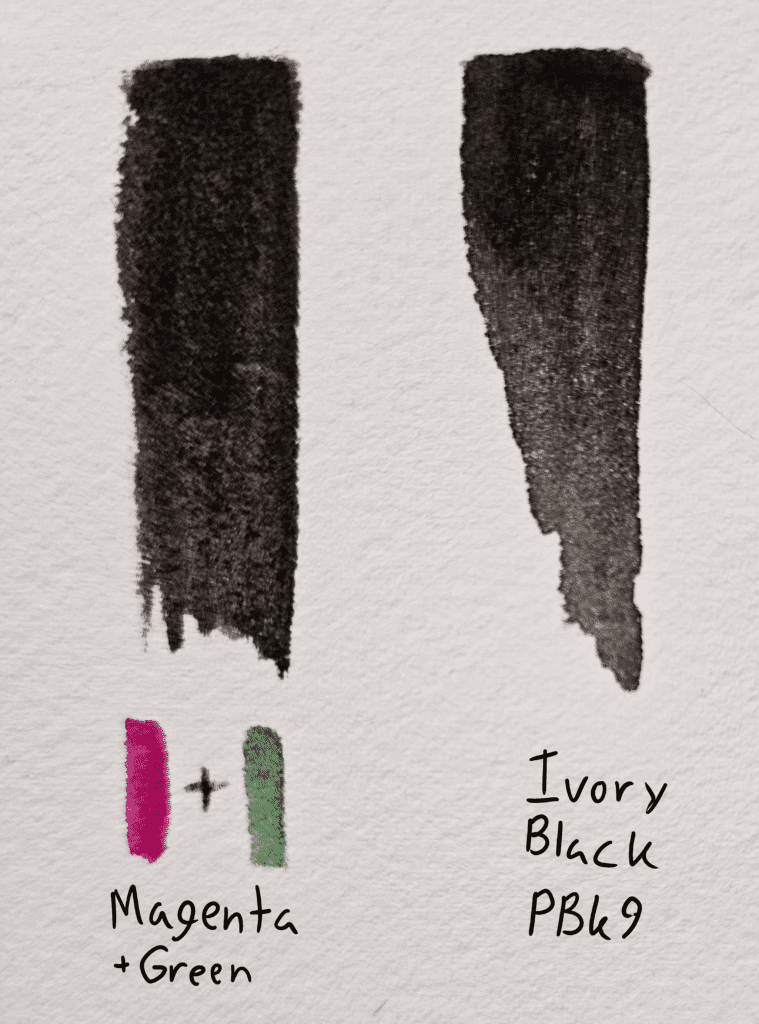
You also don’t need black or white or grey paint in watercolors. If you mix two opposites on the wheel, you get grey. In watercolor, when you mix two colors, you sometimes get a darker color, so when you want to make black, just mix two dark opposite colors. This is better than using a black paint because its just as dark as black but it retains some vibrancy, while straight black is typically a very dead and desaturated looking color. Additionally, when you mix your own black, you can have it lean in one direction or another in terms of color by mixing more of one color than another.
Mixing colors effectively
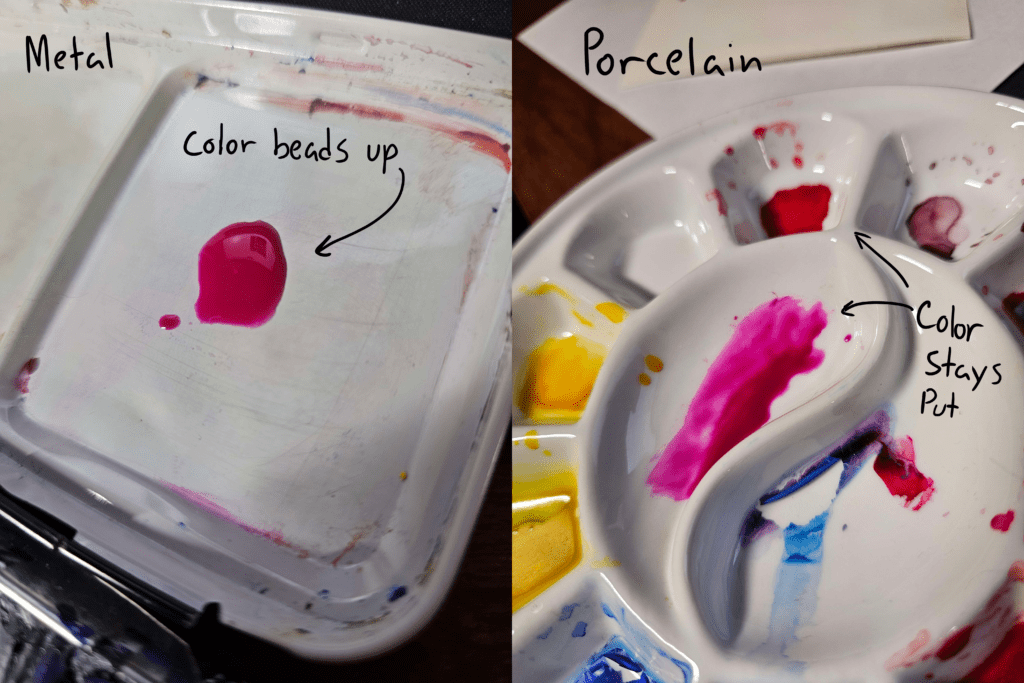
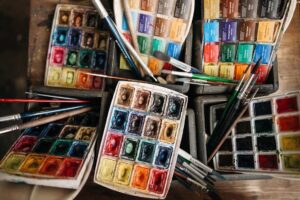
To mix colors effectively, make sure you have a good healthy amount of paint to work with, and a proper surface to mix them. White porcelain makes the perfect mixing surface because the material allows the paint to stay where you put it. On a metal or plastic mixing surface, the paint tends to bead up which makes it a bit harder to see what color you just mixed. The downside of porcelain is that its heavy and fragile, so more of a stationary mixing surface, while metal or plastic palettes may be better on the go.
Having a healthy amount of paint is important because it reduces the effects of contamination from other colors. If you get a little bit of blue in your big pile of yellow, it’s barely affected, and as simple as wiping the blue off with a brush. If you get a little bit of blue in your tiny bead of yellow, you’ve got green paint.
Another tip for avoiding contamination and keeping your mixtures clean is to always keep your brush clean. You need one clean cup of water and one dirty. The clean cup is to dip your clean brush into to get it wet. The dirty cup is to clean your brush. It’s also helpful to rinse and refill your dirty cup when it gets too dark and muddy.
Creating Your First Painting
I’ve put together a little art project in which you can put some of the aforementioned ideas into practice.
What you will need to follow along – A pencil, Watercolor paper, flat brush and round brush, paints, palette, 2 cups of water, a rag to wipe your brush.
We will be painting a vase in a box. At this stage, it would be helpful to have learned a bit of observational drawing and practiced a bit, as we will be making a basic drawing to start. If you haven’t, check out my intro to observational drawing first and practice a bit.
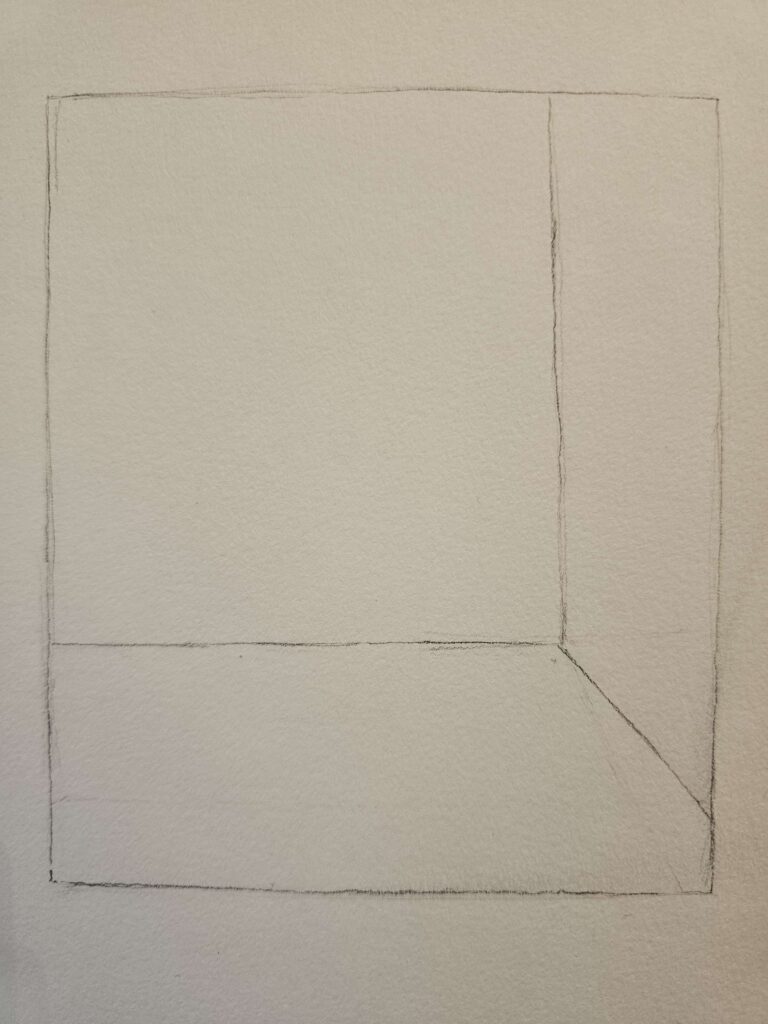
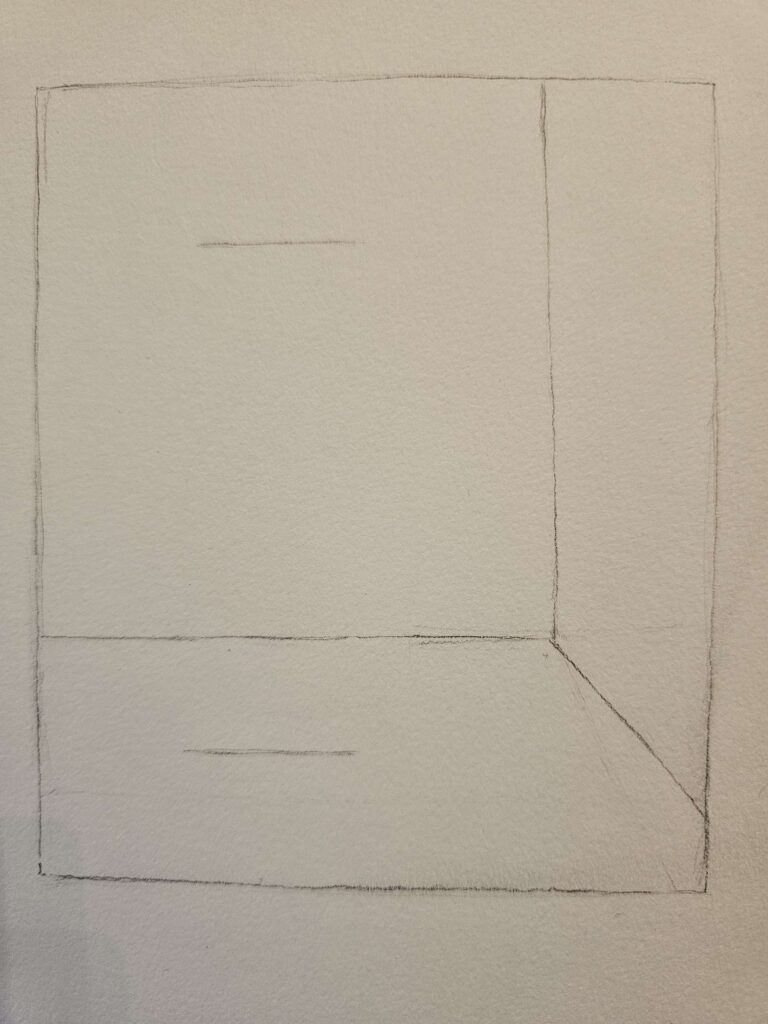
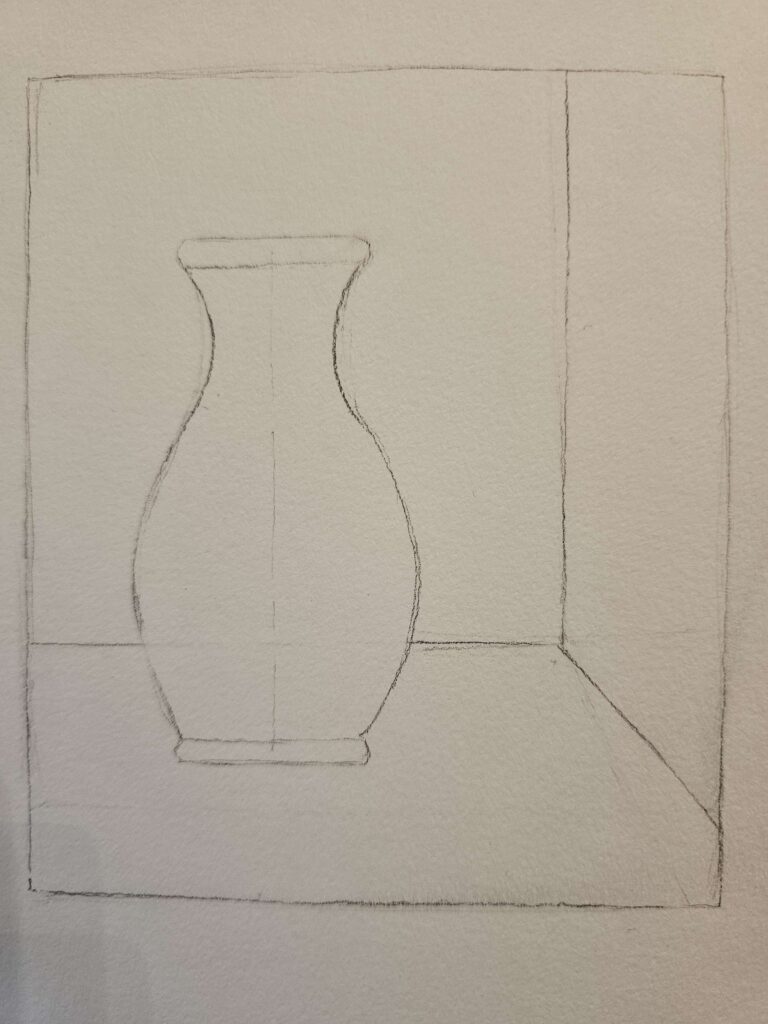
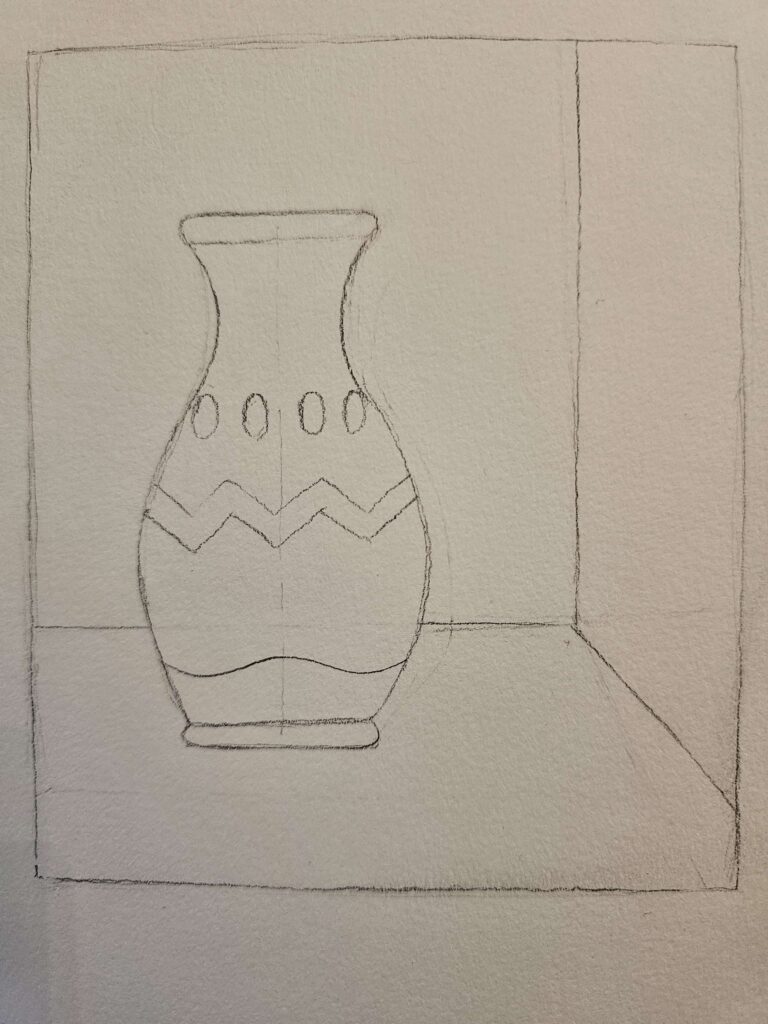
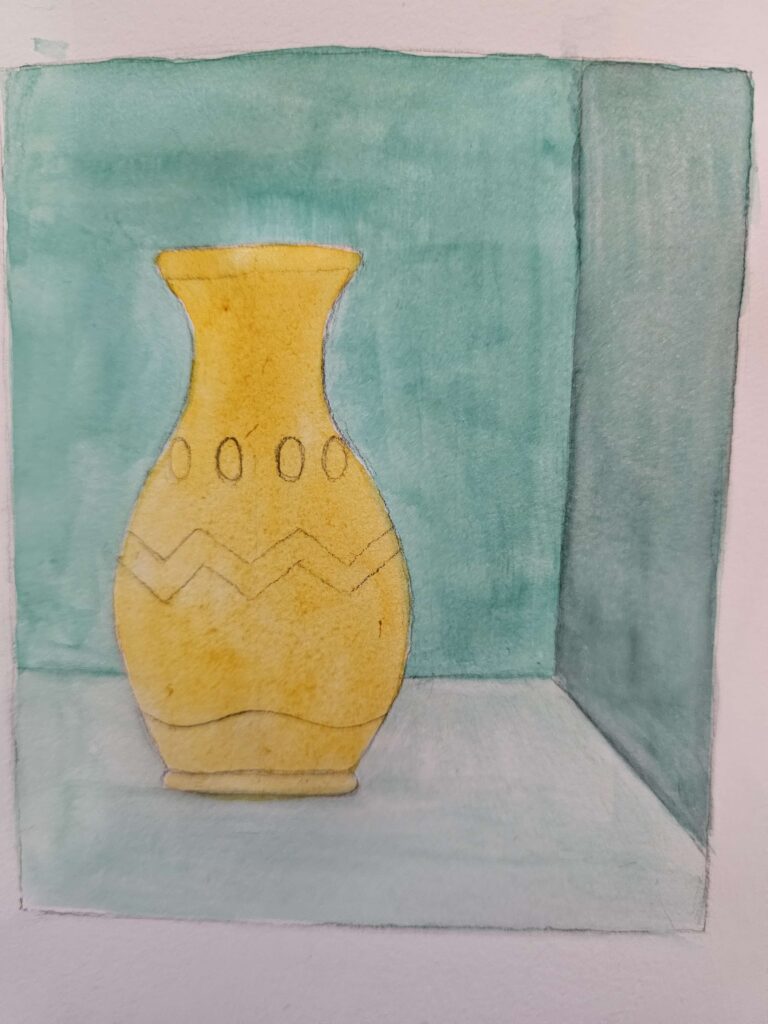
I start by deciding how the vase is going to fit in my composition. Then when I have all my elements in place, I sketch in the vase shape. The top, neck, belly, and bottom. Keeping it simple. Third, I add two simple patterns on the belly of the vase. You can copy mine exactly or you can tweak the scene to your liking. As long as there’s a vase, a floor, and two walls, it’ll work.
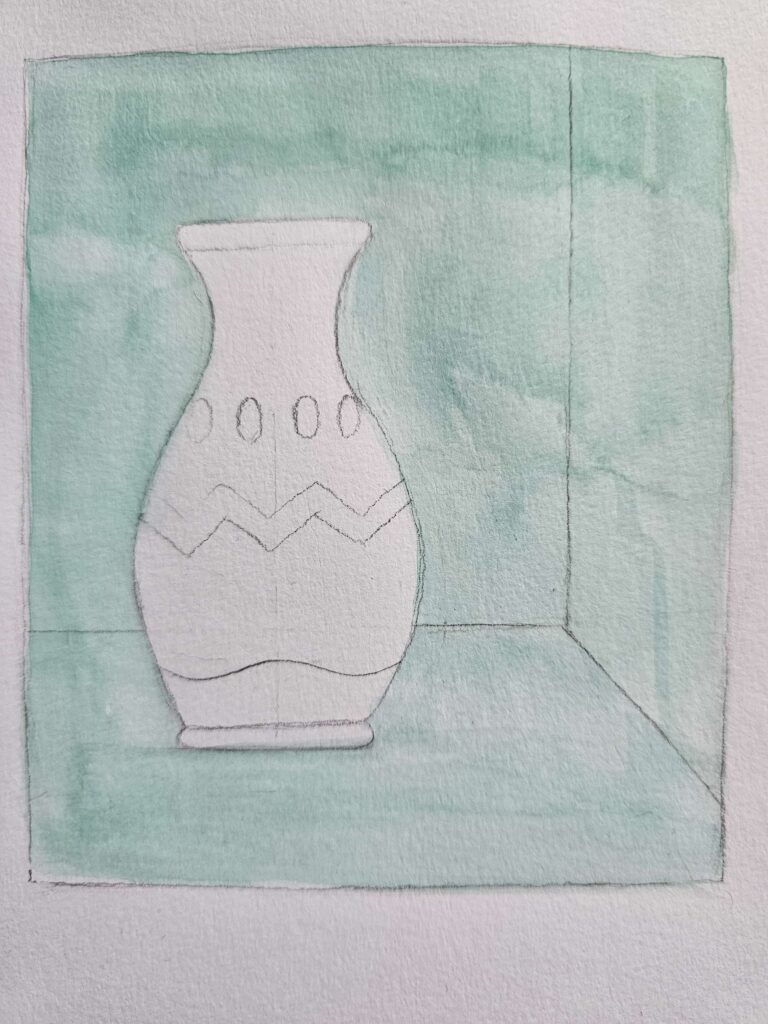
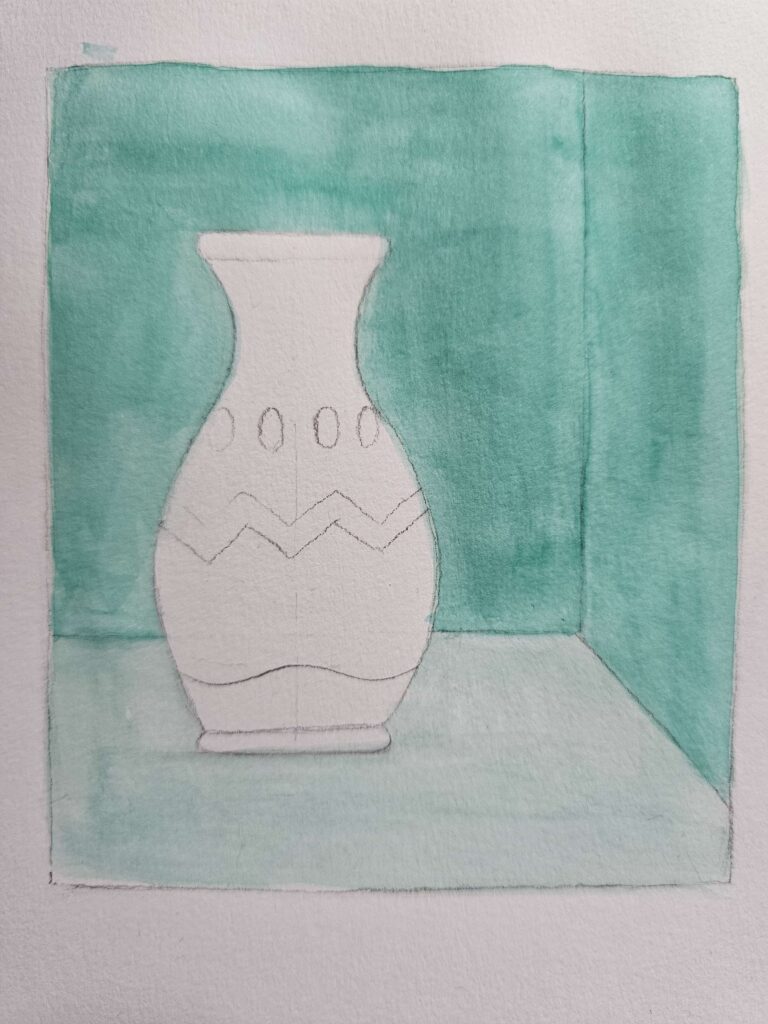
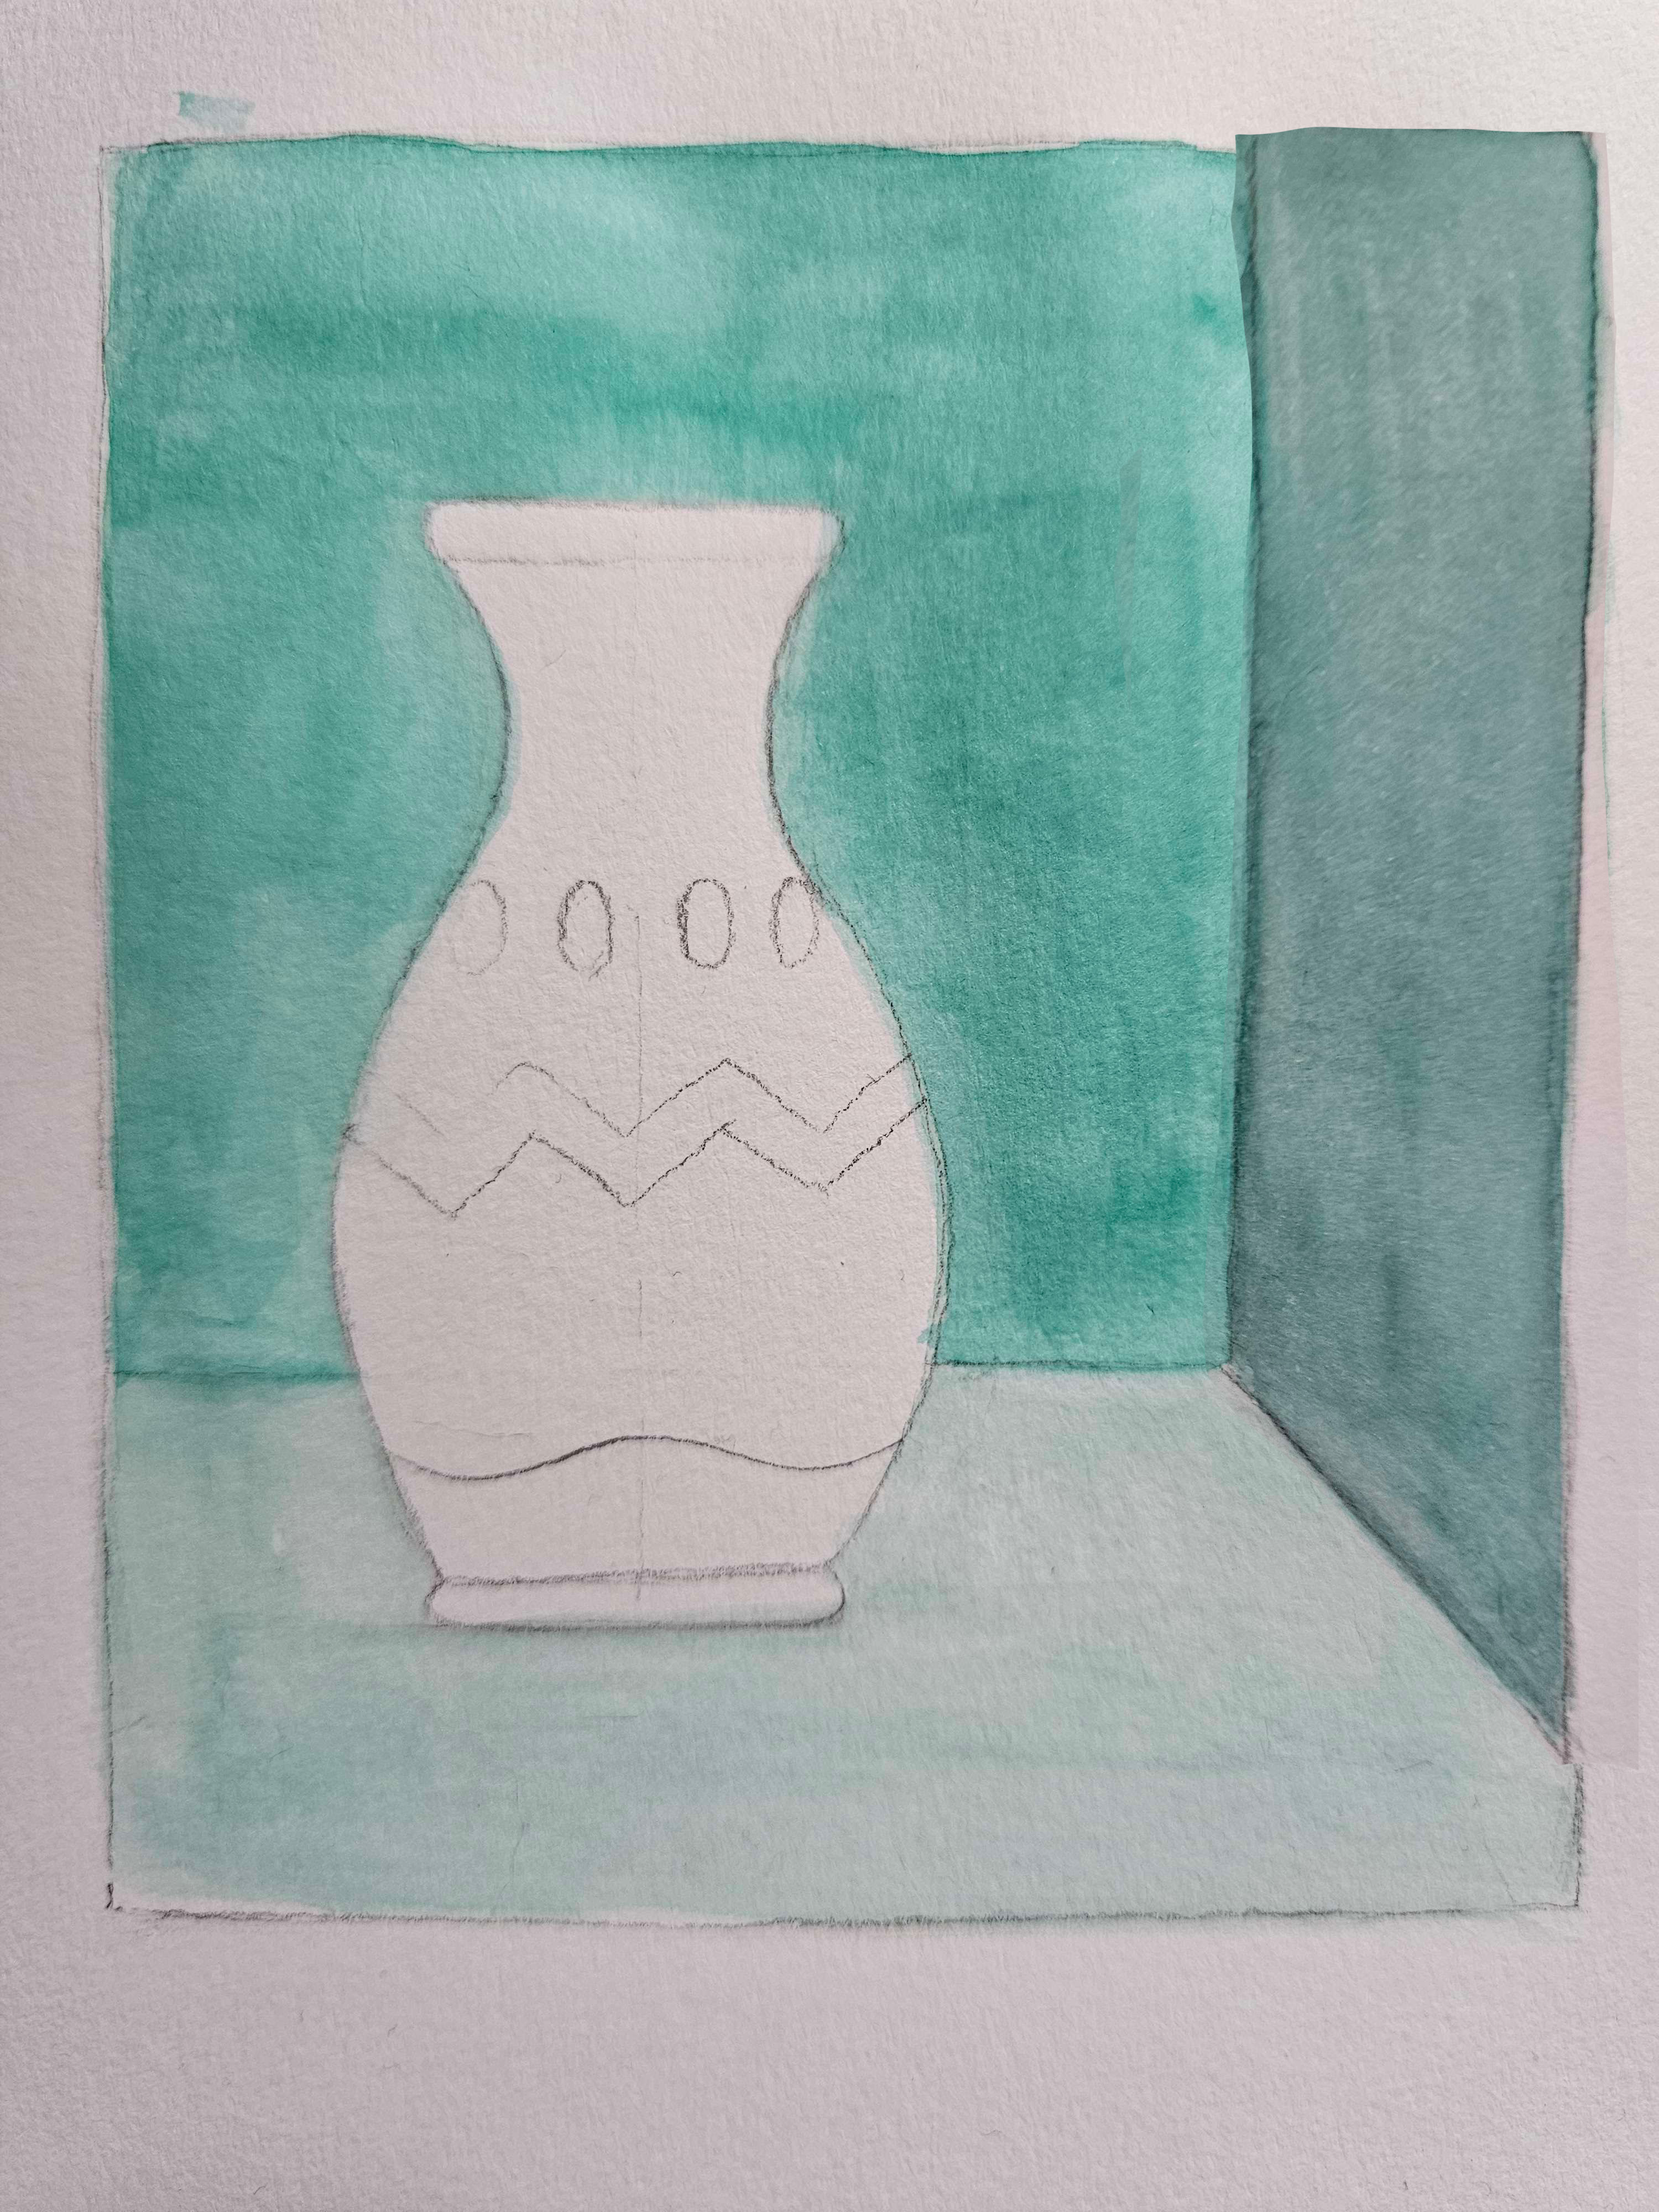
Step 1 – Take any color you like, water it down, and apply it to the entire background. Wait for it to dry completely. Then take that same color, a little less watered down, and apply it to the two walls. Wait for that to dry completely. Now take that color you chose and find its opposite on your color wheel. Mix that opposite with water and glaze it just on the right side wall. What we end up with is a simple 3 dimensional space for our vase to exist in.
You may notice that the color is splotchy and uneven when you try to lay a flat layer of color down. There are ways to avoid this that will be covered in a later article. To put it simply, it may be from using cheaper paper, going into areas more than once before they dry, not covering the whole area before it begins to dry, using staining dye based paint, etc. I made mine uneven by using the wrong paper and brushes to show you that even if you don’t get every layer perfect, you can still end up with a successful painting. So don’t stress if things aren’t going as smoothly as you might have hoped. Just keep going until you can call it finished.
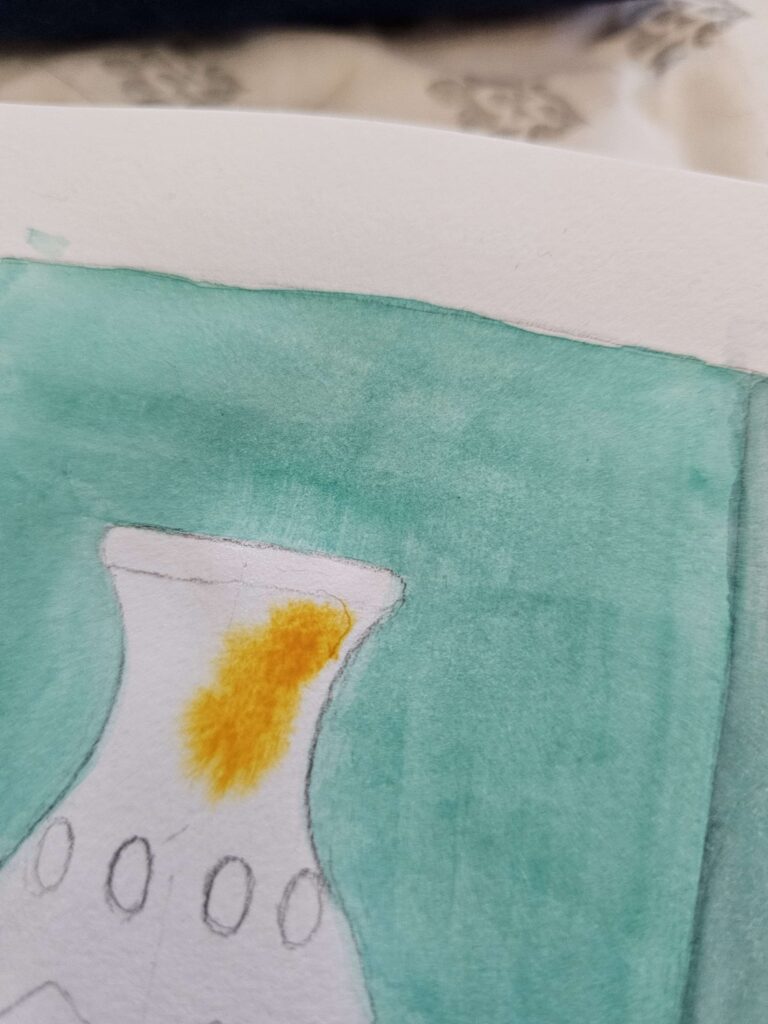
Step 2 – Mix a color for your vase on your palette along with a darker color you’re gonna use for the shadow. We will be using the wet on wet technique for this part. Take a clean wet brush and wet the area of your vase. Make sure to stay inside the lines and not wet anything outside the vase. While the surface is still wet, start applying your lighter color by touching the wet surface with it. You’re not stroking the paint on, just dabbing it and watching it spread on its own. Before that dries, dip into your darker color and dab it along the edge of the vase. If you did it right, you should see the vase look a little more 3D because now it has shadows on one side.
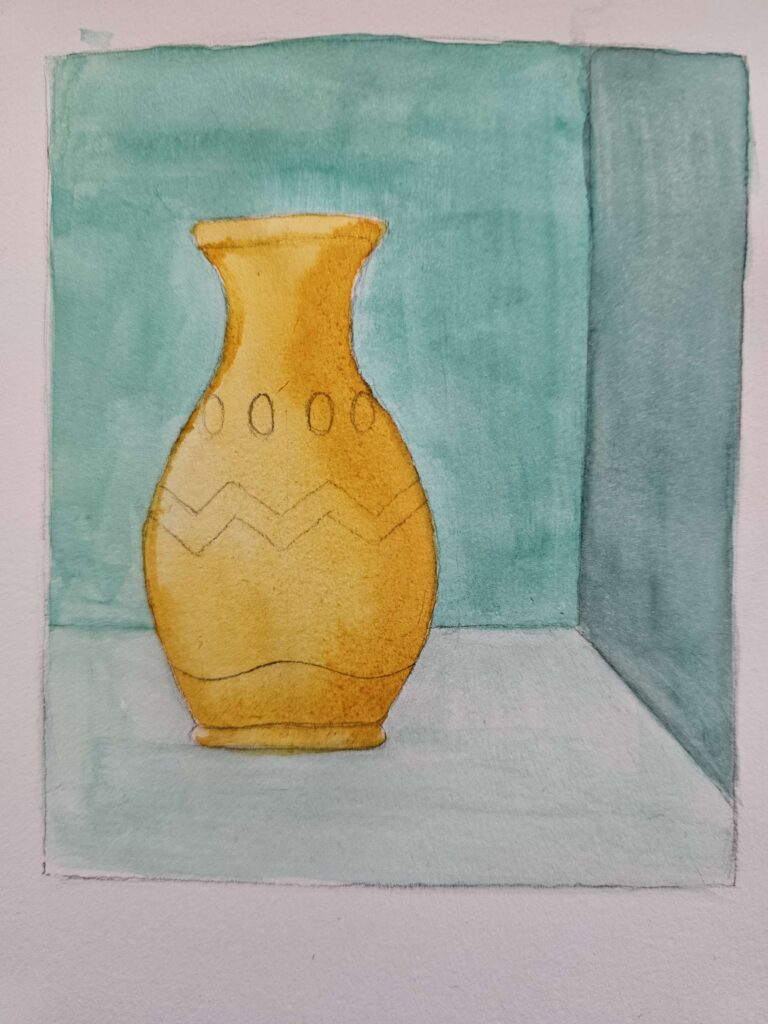
You may have to apply more paint as the painting is drying because when it dries, you will notice your color is fading a bit. You can go back into the painting with your lighter and darker color several times but be sure not to overdo it because we will be going over it again when the vase dries.

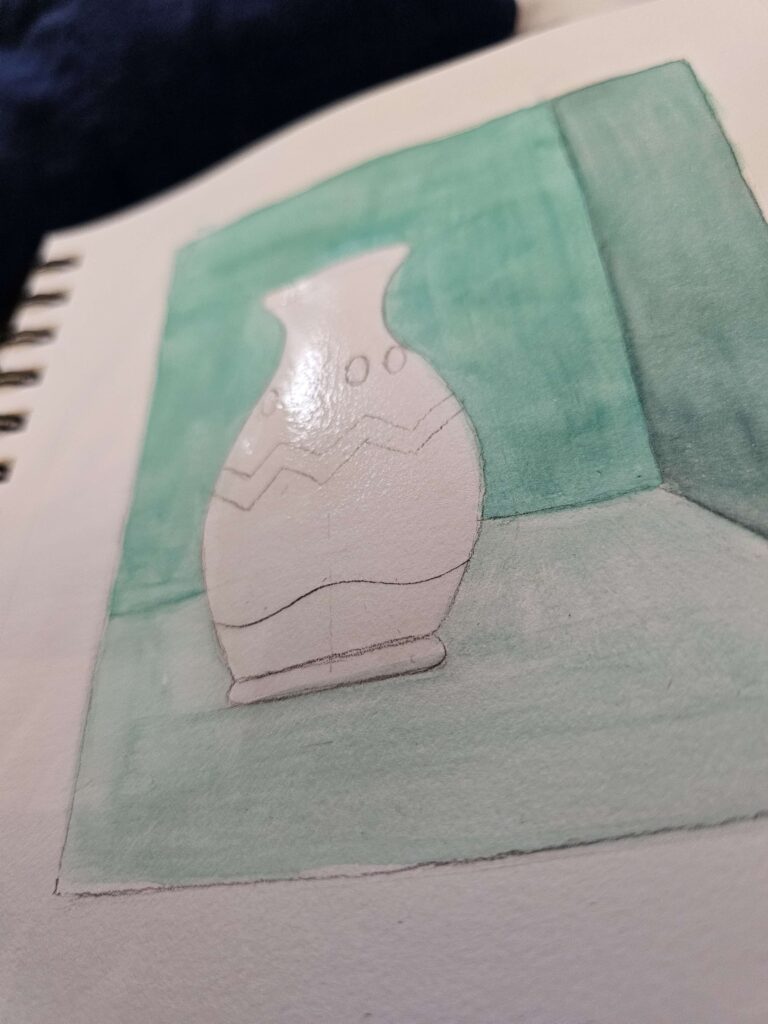
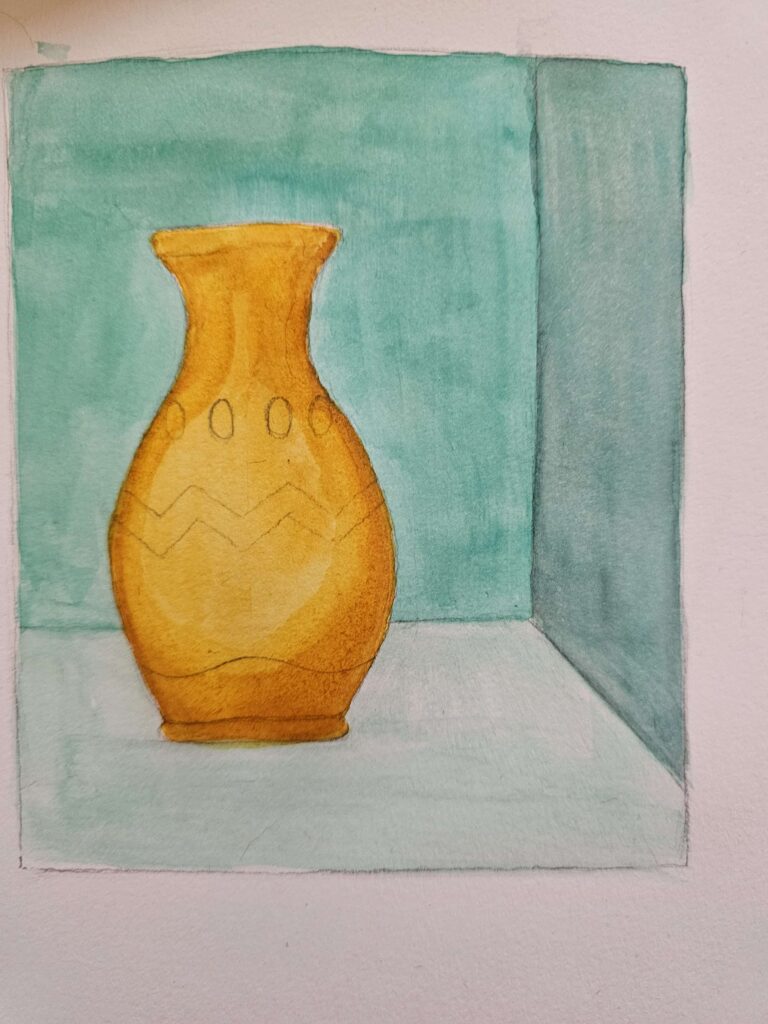
Step 3- After our vase has dried a bit, but not completely, we may have an opportunity to pull out some of the color to make the highlights. We do this by rubbing the areas we want lighter with a clean damp brush, and then gently dabbing the area with a clean paper towel. If we aren’t using a staining color (a color that is very difficult to remove) We should have something like the image above. This is called scrubbing. Another way we could’ve done it is to leave those areas blank to begin with. There are many ways to achieve your goals in painting. It really depends on the look you’re going for. Since this is the easier method, this is what we’re doing.
At this stage, we can also go in with our dark color again and deepen it a bit. What you may notice is that with dry paper, the edge of your brush stroke is hard (solid), while a wet on wet technique results in a soft transition between colors. To soften out your hard edge, just use the side of a damp brush to gently run over the edge, which will make the color run a bit and lose said edge.
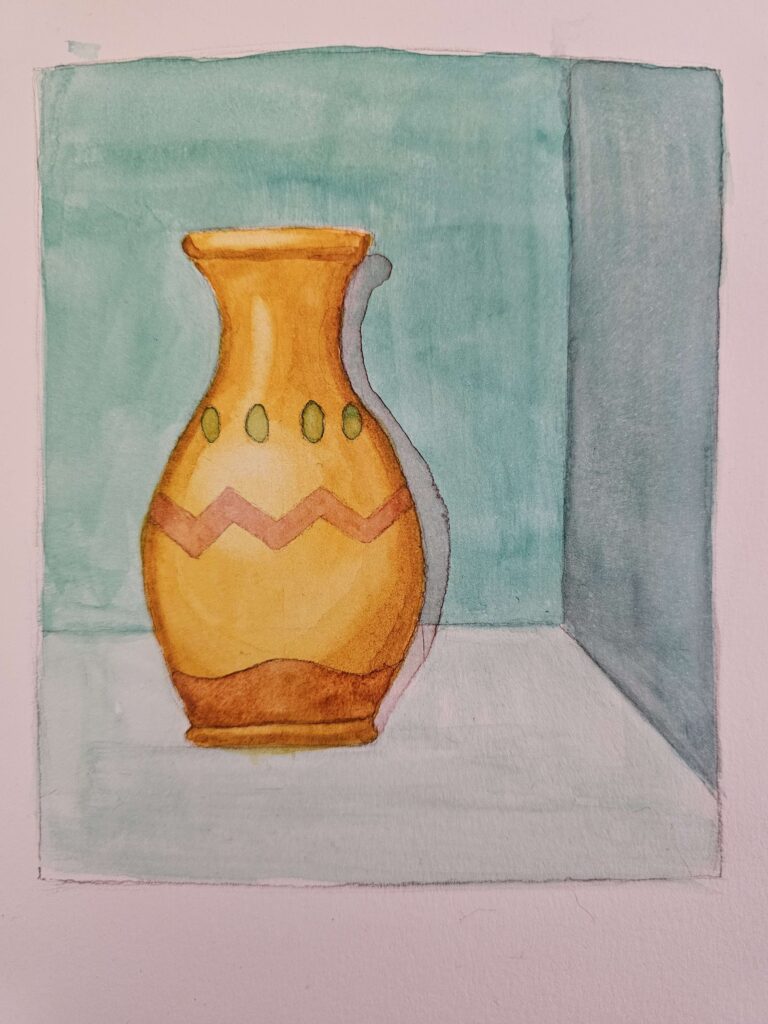
Step 4- Now that you have an idea of how glazing and charging work, you can figure out how to finish your painting on your own. Above is an image of my finished painting. I used the same colors used throughout the beginning of my painting and just kept making decisions and layering. It’s important that you are able to plan out and finish your painting with no instruction. With more experience and knowledge, the better your plans will be. It’s alright if you try something and it doesn’t work. You’ll do what you can to fix your mistake and know not to make that mistake next time.
This is by no means a masterpiece, and there’s no way I can teach you everything in one blog post, but it’s a great start to learn these fundamentals and practice them.
Tips for Continued Practice
Importance of regular practice
Speaking of practice, this is the number one thing in Art. If you wanna be good, study and practice. If you wanna be great, study and practice more. If you wanna be the best, study and practice more than anybody ever has. There’s no shortcut or secret technique. It’s very hard to be good at art, and the better you get, the harder it gets.
There are plenty of resources and tutorials about watercolor painting on the web, in bookstores, in schools and ateliers. There are many ways to learn and there’s no one best way. Other than learning, it’s also valuable to look at the world in terms of inspiration. What gets you going and inspires you to create?
Conclusion
Watercolor is a difficult medium to master in painting, and maybe even more-so than oils and acrylics. Luckily it’s not too difficult to get into and learn some basics. Nothing worth doing comes easy. Creating something remarkable is even more difficult. People often refer to art as relaxing or joyful. I don’t believe that anybody who actually knows how to make art would make that claim. It is fulfilling, and therefore therapeutic, but that fulfillment requires a great deal of sacrifice.
Nobody can tell you what’s worth doing. But I did just tell you how to do something that might be worth doing. The rest is all up to you. I hope this piece was helpful. If you have any questions or would like to understand something better, please comment down below and I will do my best to assist.
More Content
If you would like to get started with Watercolor but don’t know what tools to get, fret not. I’ve compiled a few articles pertaining to that very topic. Check them out below!
Best Watercolor Paper for Artists of all budgets